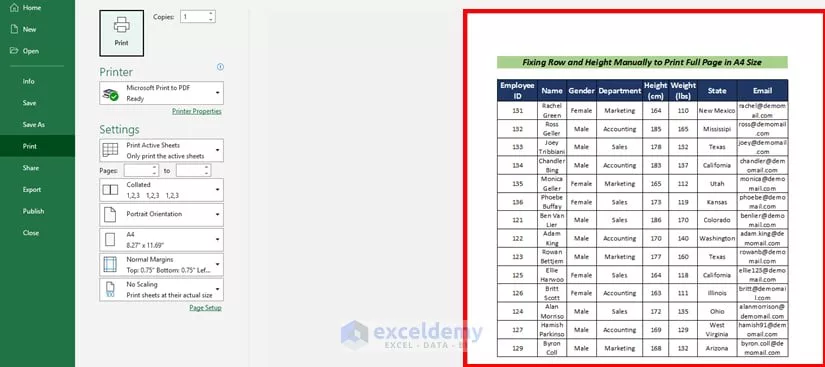
Full-page printing is a common problem faced by Excel users, and in this article, we have discussed its solutions.
Suppose you’ve ever encountered problems when printing Excel files, such as columns being cut off, tables being messy, or text being small. In that case, you’ve probably wondered how to print a full page in Excel.
In this article, we are going to teach you, in a complete and step-by-step way, how you can print your Excel sheets neatly and entirely on paper so that all the information fits on one page. We will also review essential tips for printing in Excel, adjusting the print scale, and preventing pages from printing incompletely.
All the ways to print a full page in Excel
The following article includes 5 different methods for those looking to learn how to print in Excel, set up printing in Excel, or learn “how to print full page in Excel.”
Method 1: Set the paper size from the Page Layout tab
One of the easiest ways to set up your page for printing is to use the Page Layout tab in Excel. This tab contains various options for controlling the appearance of the page and print settings. When you change the paper size from here to, say, A4, Excel will automatically try to adjust your content to the same size. Of course, this setting alone may not be enough, but it is a crucial first step.
Its working steps are as follows:
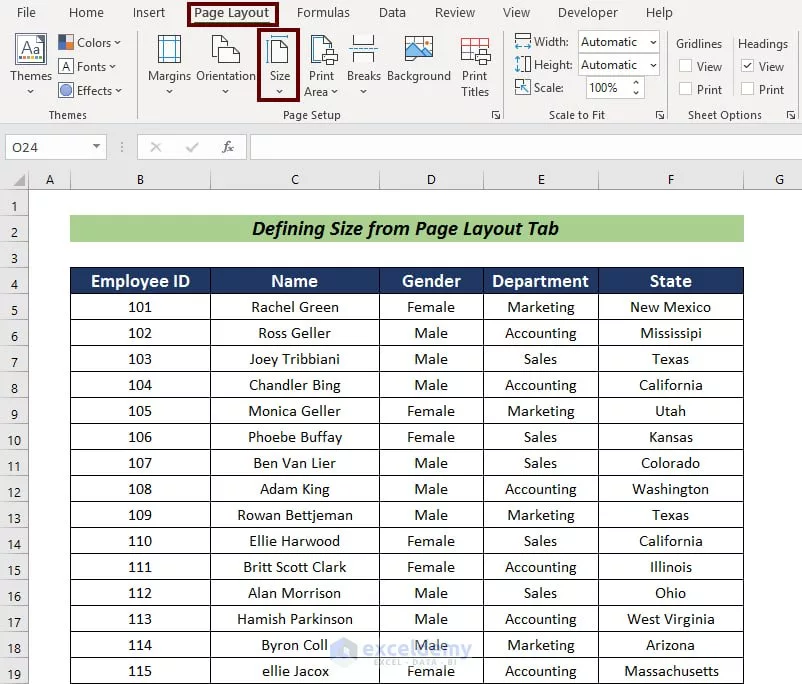
- First, go to the Page Layout tab at the top of the Excel page.
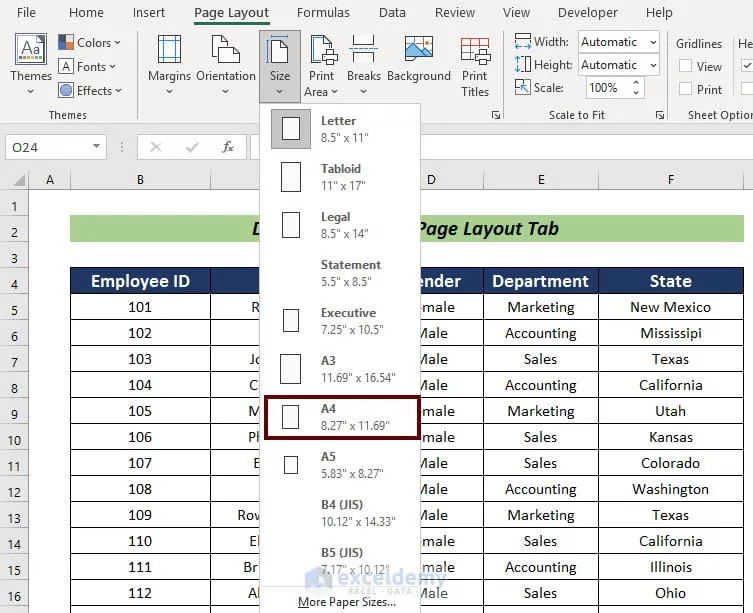
- Click on the Size option to open a list of different paper sizes.
- From the options, select A4, which is the standard size for printing on most printers.
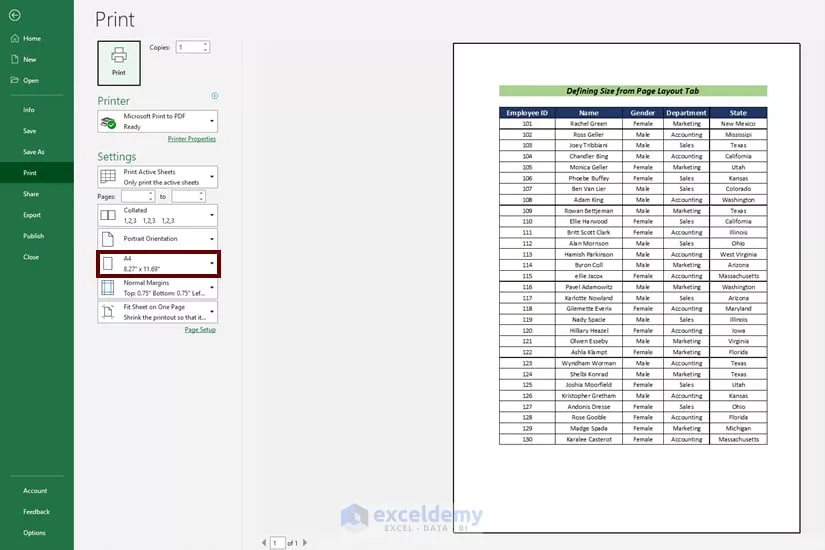
- You can then preview the print by pressing Ctrl + P or going to File > Print.
- In this preview, you will see that your page is set to A4 size, and you can check the final result.
This quick and straightforward method is the most basic way to get a full-page print job in Excel and start printing.
Method 2: Use Page Setup for more precise settings
Sometimes just setting the paper size isn’t enough. For example, you might have a huge table and you want to make sure that it all prints on exactly one page, without any data going off the page or being split across multiple pages. The Page Setup section is the best place to do this. Here you can specify that Excel shrink or enlarge the content to fit exactly on one page.
The steps to use it are as follows:
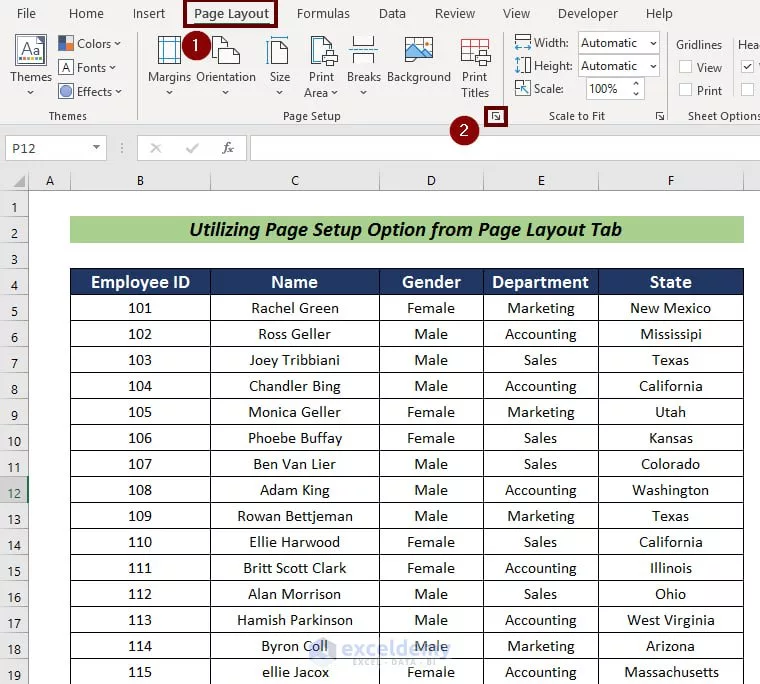
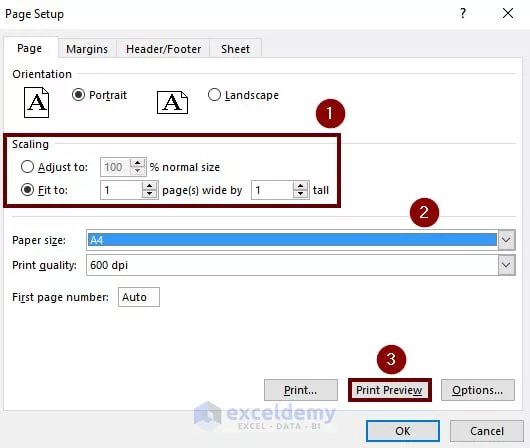
- On the Page Layout tab, look for the Page Setup section and click the small arrow next to it.
- A window will open with advanced print settings.
- Go to the Scaling section and select the Fit to option.
- Enter the number 1 in both boxes to fit the entire page content on one page width and one page height.
- Make sure the paper size in the Paper Size option is set to A4.
- Finally, click Print Preview to check the changes.
This way, you can ensure that your table prints completely and evenly on an A4 page.
Method 3: Adjust the page size in the Print Preview window
When you’re trying to print your file, it’s always a good idea to preview it first to make sure everything looks right. One easy way to adjust the print size is to do it directly from the Print Preview window.
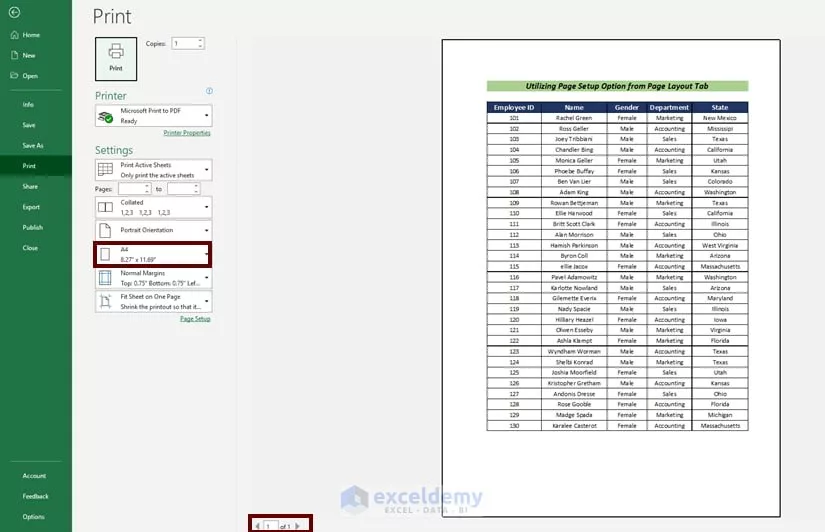
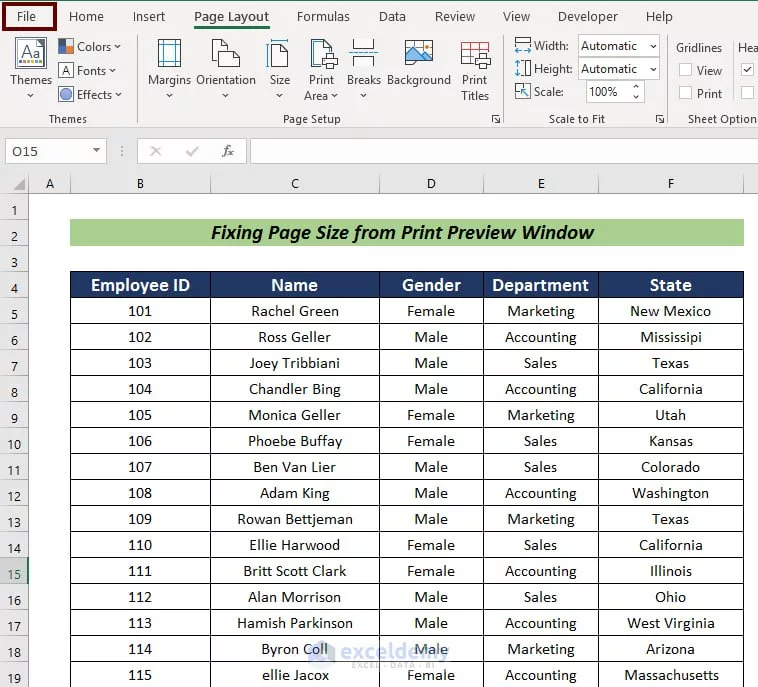
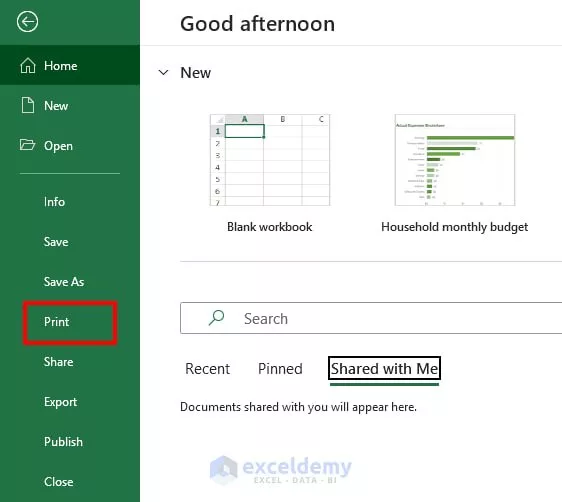
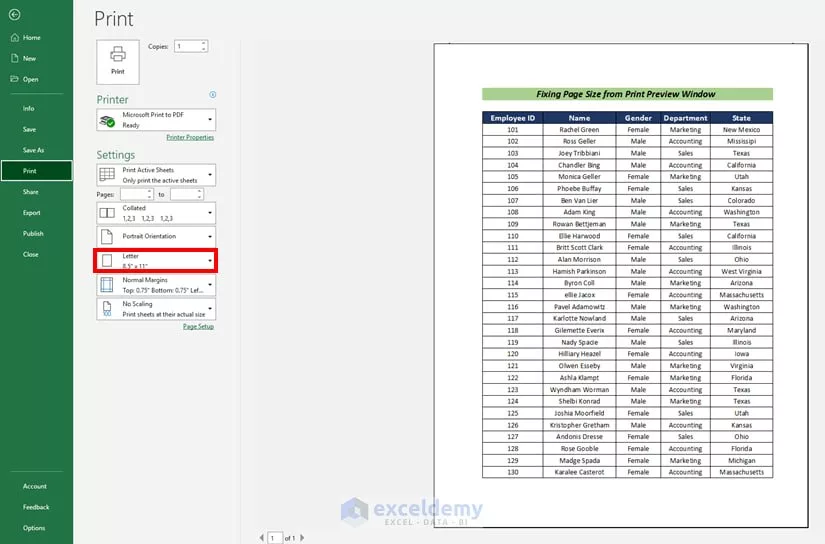
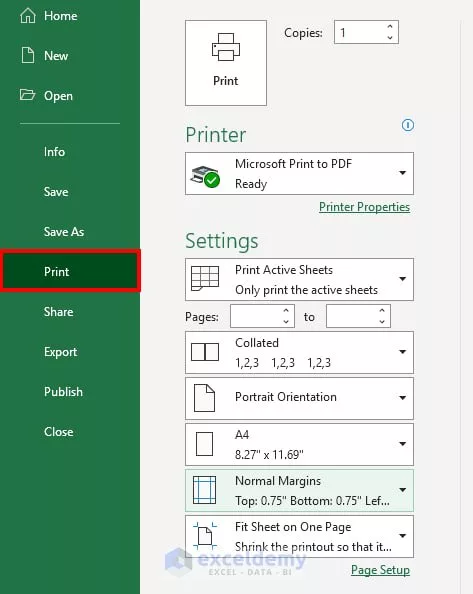
- Go to the File tab and select the Print option or press Ctrl + P.
- In the print preview window, go to the Settings section.
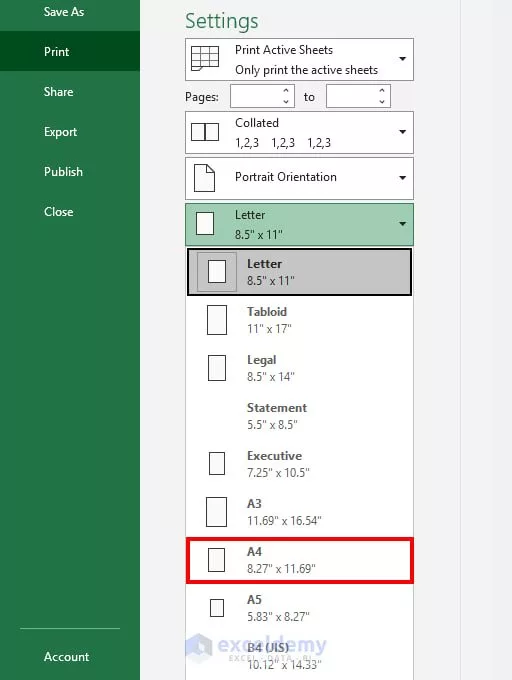
- Click on the option that displays the paper size.
- Select the A4 option.
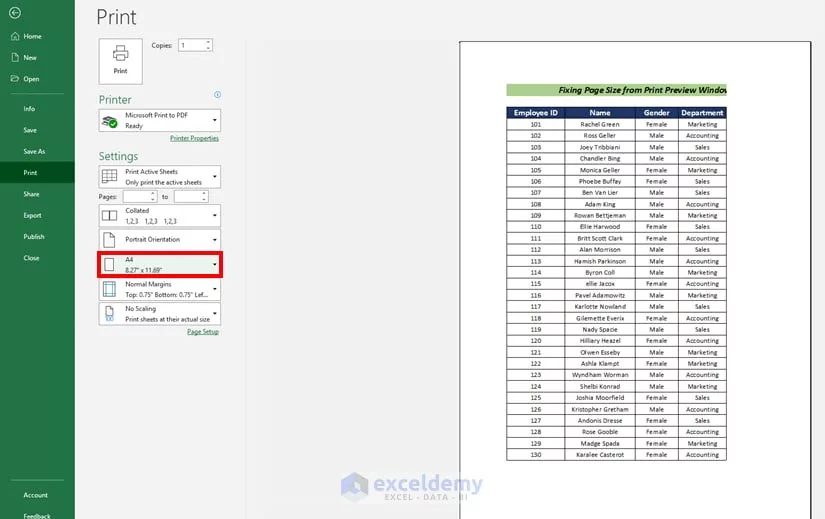
- If everything is correct, you can confirm the print.
This will ensure that the page size is set correctly and completely to A4, preventing incomplete printing. This method is beneficial for those looking for a quick way to adjust the print size.
Method 4: Adjust the print scale (Scaling) to fit the entire page on A4
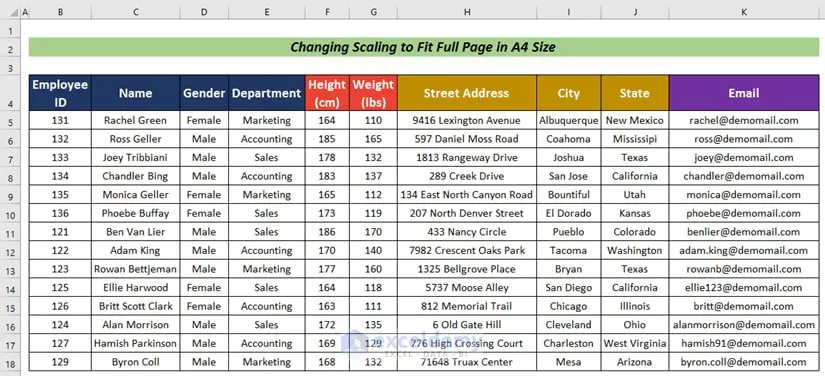
When your data is extensive, the entire table may not normally print on one page. In this case, setting the print scale can be a big help. This option will make Excel automatically adjust the size of the data so that the entire table fits on an A4 page.
- Press Ctrl + P to open the Print Preview window.
- In the Settings section, select the following options:
- Page orientation (Orientation), which is usually Portrait or Landscape.
- Set the paper size to A4.
- Enable the Fit Sheet on One Page option or equivalent.
- Excel will now automatically shrink the content to print on an A4 page.
This method is beneficial because the entire content is printed on one page without requiring manual adjustments to column widths or row heights.
Method 5: Manually adjust column widths and row heights
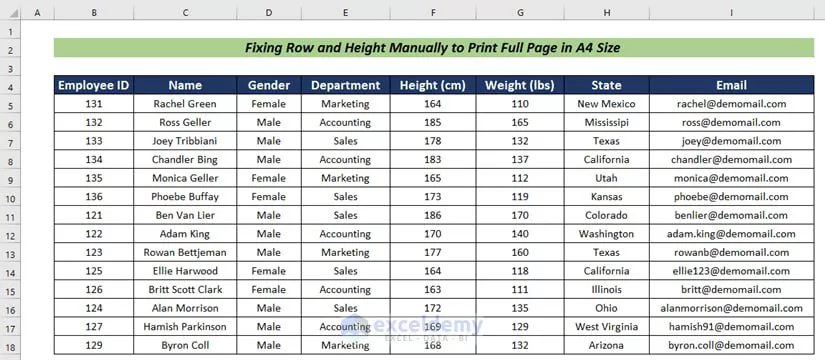
Sometimes your table is so large or wide that none of the automatic adjustments work perfectly. In these cases, it’s best to manually adjust the columns and rows a little to make everything fit on one page.
Of course, this method is a bit time-consuming, but it gives you more control over the appearance of the print.
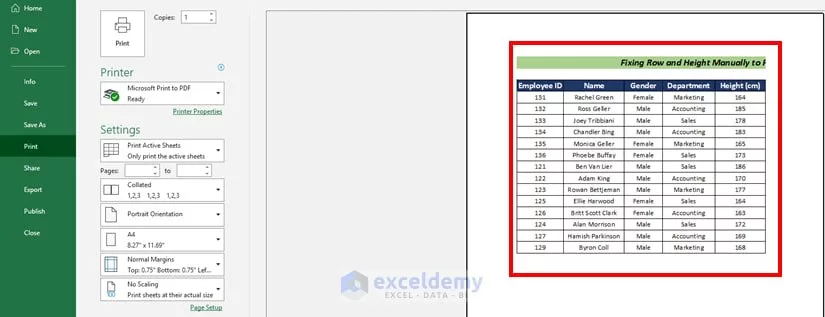
- Go to print preview again with Ctrl + P.
- If the entire table does not fit on one page, exit the Excel window.
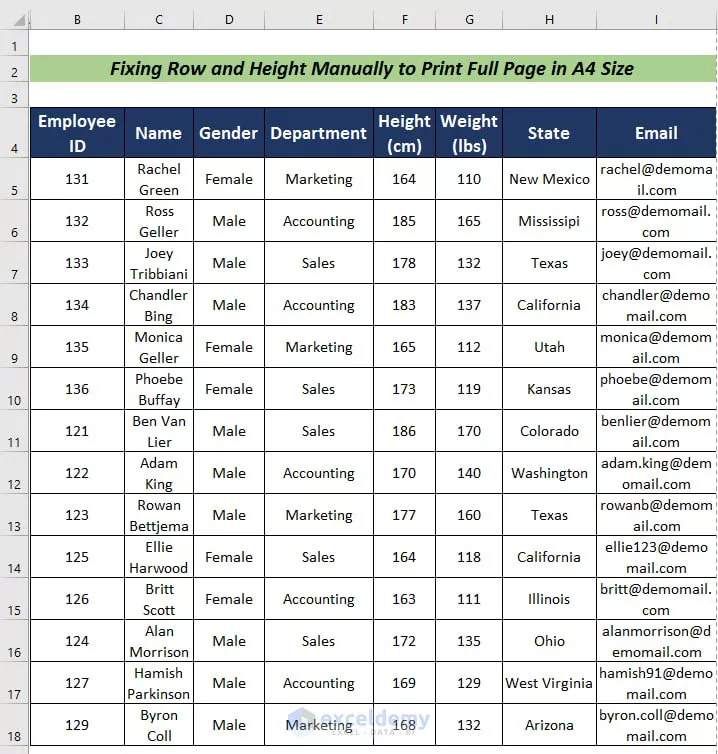
- Reduce the width of the columns; to do this, move the mouse over the column border and drag to make the columns narrower.
- You can also reduce the height of the rows to save space.
- Recheck the print preview to make sure all the data fits on the page.
Final tips for printing in Excel
Finally, to summarize the article on how to print a full page in Excel, we will mention a few points.
- Always use the Print Preview option before printing to make sure of the results.
- If the data is extensive, it is better to use the fourth method, which is adjusting the print scale.
- Always set the paper size to A4 unless you want to use larger sheets.
Suppose you are looking for the answer to the question “How to print full page in Excel”. In that case, these 5 simple and practical methods can help you get the best results and complete your printing work easily.
Frequently Asked Questions
Why doesn’t the entire Excel page print when I print?
Usually, the main reason is that the page size or print scale is not set correctly. You should set the paper size to A4 via the Page Layout tab and enable the Fit to One Page option in the print settings so that the entire content fits on one page.
How can I fit an entire Excel sheet onto one A4 page?
You can do this by using the Scaling option and setting Fit Sheet on One Page. Also, if the data is extensive, it is better to make the columns and rows a little narrower to maintain readability.
Are the methods mentioned applicable to all versions of Excel?
Yes, most of these methods are similar in different versions of Excel, just the exact location of the options may be slightly different.
What should I do if my table is too large and I can’t fit it on one page?
You can split the print into multiple pages or adjust the print scale to print various pages. It is also possible to manually reduce the column width and row height.
