How to activate Cloudflare CDN and its initial settings 2025
CLOUDFLARE CDN SETUP AND BASIC SETTINGS

Activating a CDN is one of the first steps recommended by web design and network experts to every website owner to increase site speed. In addition to increasing site loading speed, a content distribution network (CDN) also provides you with other features; these features mainly depend on your CDN provider. Today, on Follow Technologies, we have decided to teach you “How to Activate Cloudflare CDN.” Even if you are not a web design expert, it is still impossible not to come across this well-known American company.
Cloudflare is the world’s largest CDN provider. According to statistics from Wpoven, more than 30% of content distribution network users worldwide prefer to use Cloudflare services.
But how does a content delivery network increase your site loading speed?
What makes Orange Cloud so popular?
And finally, how do you use Cloudflare’s content delivery network services?
This article will answer all your questions today, so stay with us on Follow Technologies until the end.
What is a CDN?
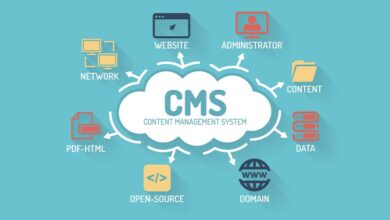
A Content Delivery Network (CDN) is a faster way to connect your website to your audience. With a CDN, your website content is stored on the provider’s edge servers. Whenever a user requests your website, they receive a response from the nearest edge server. Let’s take a closer look at this with an example.
Suppose you own a company with a unique product. Your product is international, and your customers are scattered all over the world. Suppose your company is the only source of your products. In that case, the shipping and delivery time of your customers’ orders will certainly be very time-consuming. Now, suppose you have one or more representatives in each country. In this case, the delivery time of orders to customers will be greatly reduced. This will increase user satisfaction with your company, and ultimately, your sales will increase many times over. In this example, your factory was your site, and your unique product was the content of your site.
What is the reason for the popularity of Cloudflare CDN?
You may have wondered how, with the giants of the CDN industry, such as Amazon Cloudfront and Facebook CDN. This newly established company doesn’t have as much experience as its competitors but has managed to capture more than a third of the market!
With our research, we came up with several answers. Cloudflare’s strengths that give it an edge over its competitors can be summarized as follows:
- Cloudflare’s special attention to security
- Many CDN panel features, even with the free plan
- Free SSL certificate offer
- Providing AntiDDOS firewall on all plans
The biggest factor in Cloudflare’s success is its focus on website security. The level of security and firewall sensitivity in Cloudflare’s content distribution network can be managed and monitored, even on the free plan.
Now that you are familiar with the concept of a content distribution network (CDN) and its importance, it is time to look at how to connect Cloudflare’s CDN to your site.
Connecting Cloudflare CDN to WordPress or any other site
The first step is to register on the Cloudflare website. For your convenience, the link to the company’s registration page is below, and clicking on it will take you directly to that page.
Register on the Cloudflare website
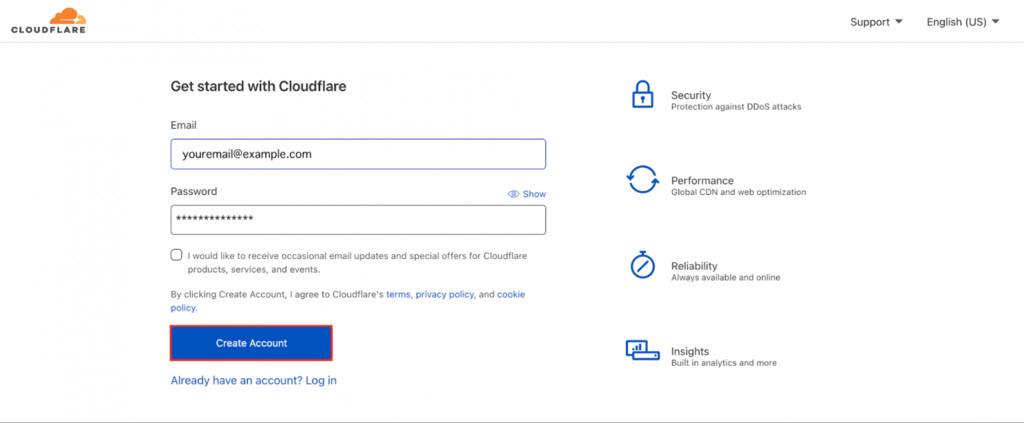
Like most sites, Cloudflare requires only an email address and password to register. After entering your email address and desired password, click on the “Create Account” option to create your Cloudflare account.
Specify the domain
After registering an account, you will be taken directly to the “Add site” page. To enter the site address in the specified box, you need to enter your site address without things like HTTP and HTTPS at the beginning. Also, you should not use the slash “/” at the end of your domain address.
After entering the domain and clicking on the Add Site option, you will proceed to the next step, where you must determine your user plan.
We will choose the free plan because we cannot pay in dollars directly. Accordingly, we will click on the Free plan. This will activate the blue “Continue“ button at the bottom of the page, and by clicking on it, we can proceed to the next step.
Collect your site’s DNS records.
After clicking Continue, Cloudflare will automatically collect your domain’s DNS records. Depending on your site, you will see a different number of DNS records on this page. Each A record will have a cloud icon next to it, with a gray cloud indicating that the CDN is disabled and an orange cloud indicating that the CDN is enabled for that record.
Each DNS record on your site can have one of two symbols. The status of each record is defined by its cloud status as follows:
Orange Cloud (Proxied)
In this case, all traffic from this record is monitored by Cloudflare CDN, and your security settings, etc., will be applied to the traffic passing through. Also, if you request an IP from this DNS using the Lookup module, Cloudflare’s IP will be displayed in the output. In addition to the above, with this option enabled, DDoS attacks will be introduced to Cloudflare’s very robust infrastructure, and these attacks cannot directly target your infrastructure server.
Cloud Gray (DNS Only)
In this case, all user requests will be sent directly to your site server and will not be monitored by Cloudflare’s content delivery network. In this case, no content from edge servers will be displayed to your users, and the user’s connection to your server will be directly linked. If you want to use custom ports to connect to your server, you must set the status of your record to DNS Only. If you request an IP from this DNS using the Lookup module, the IP of your site server will be displayed in the output.
We recommend that you do not manually change the CDN status for different records. The Cloudflare content distribution network system is so smart that it will automatically apply the optimal settings for you.
Change Nameservers
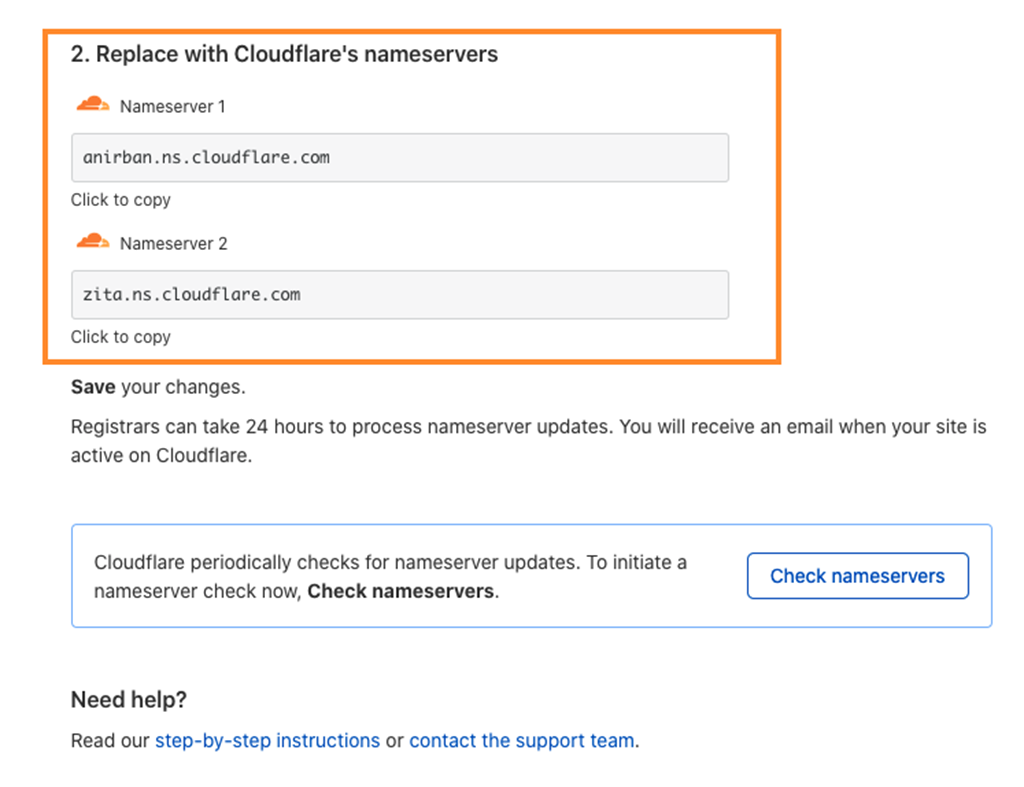
After completing the DNS check, we will now enter the next step by clicking on the Continue option. At this stage, you will be asked to replace your domain nameservers with the nameservers of the Cloudflare CDN network. For this, an article has been prepared in the Follow Technologies, which you can easily do by referring to it. To access this article, click on the link below.
With the nameservers changed you are almost done. At this point, you need to go back to your Cloudflare dashboard and finally click on the “Check nameservers“ option to indicate your readiness to route the data to the Cloudflare content distribution network.
Getting Started with Cloudflare CDN
By clicking on the option mentioned, the Cloudflare site will check your name servers. If you have changed the name of the servers correctly, you will enter the Quick Start process.
Below, we will review all the Quick Start steps and explain each one.
Improved security
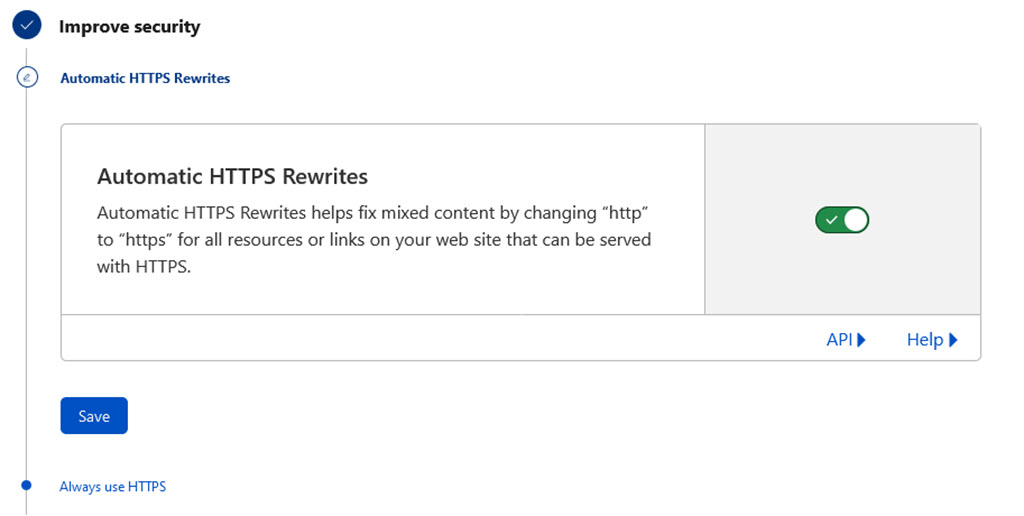
The first step is to improve your site’s security. This step is called “Automatic HTTPS Rewrites.”” By enabling this option, all links on the site will be presented to your users using the HTTPS security protocol. This option solves the “Mixed Content“ error on your site. After selecting the desired option, click on the Save option and proceed to the next step.
The next step is called “Always Use HTTPS.“ This option is similar to the previous step. By enabling this option, even if the user intentionally decides to use the HTTP protocol, they will be automatically redirected to the HTTPS protocol.
Site optimization
The next step concerns optimizing the site’s size. By enabling the Auto Minify option for each of the CSS, HTML, and JavaScript items, the size of the source code on your site will be optimized and compressed.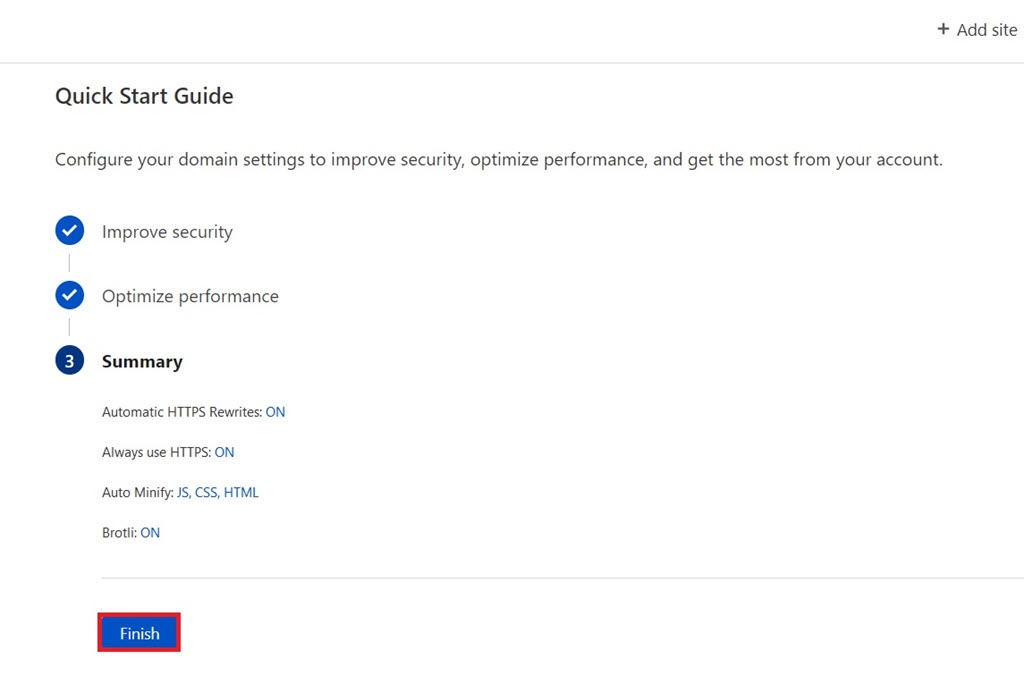
Finally, the last option in the Quick Start settings is related to the Brotli settings. According to Cloudflare, enabling Brotli compression will speed up page loading over HTTPS requests.
Finally, click on the Save option to display a summary of the settings applied. After reading it, click on the Finish option to complete the initial configuration of the Cloudflare content distribution network.
Final words
It is important to know that the results of using Cloudflare’s CDN are not visible instantly. It will take between 1 and 3 days to apply your settings and fully synchronize the company’s DNS with your domain and service. In the end, we hope that you have benefited from this article. At Follow Technologies, our main goal is to answer your questions and needs, dear users, so if you have any questions about this article, please share them with us in the comments section at the bottom of this page.
May success accompany you.







Good morning. Do you recommend using Cloudflare CDN for an online store? Is there any particular problem?
Hello
There are no restrictions on the use of the domain and there is no problem with this.
Can CDNs like Cloudflare prevent DDoS attacks?
Hello
It doesn’t completely prevent attacks, but it has a very good effect.
How to turn off the Cloudflare challenge?
Sorry, we didn’t understand what you meant
Please explain more so we can provide you with a better answer
Thanks